
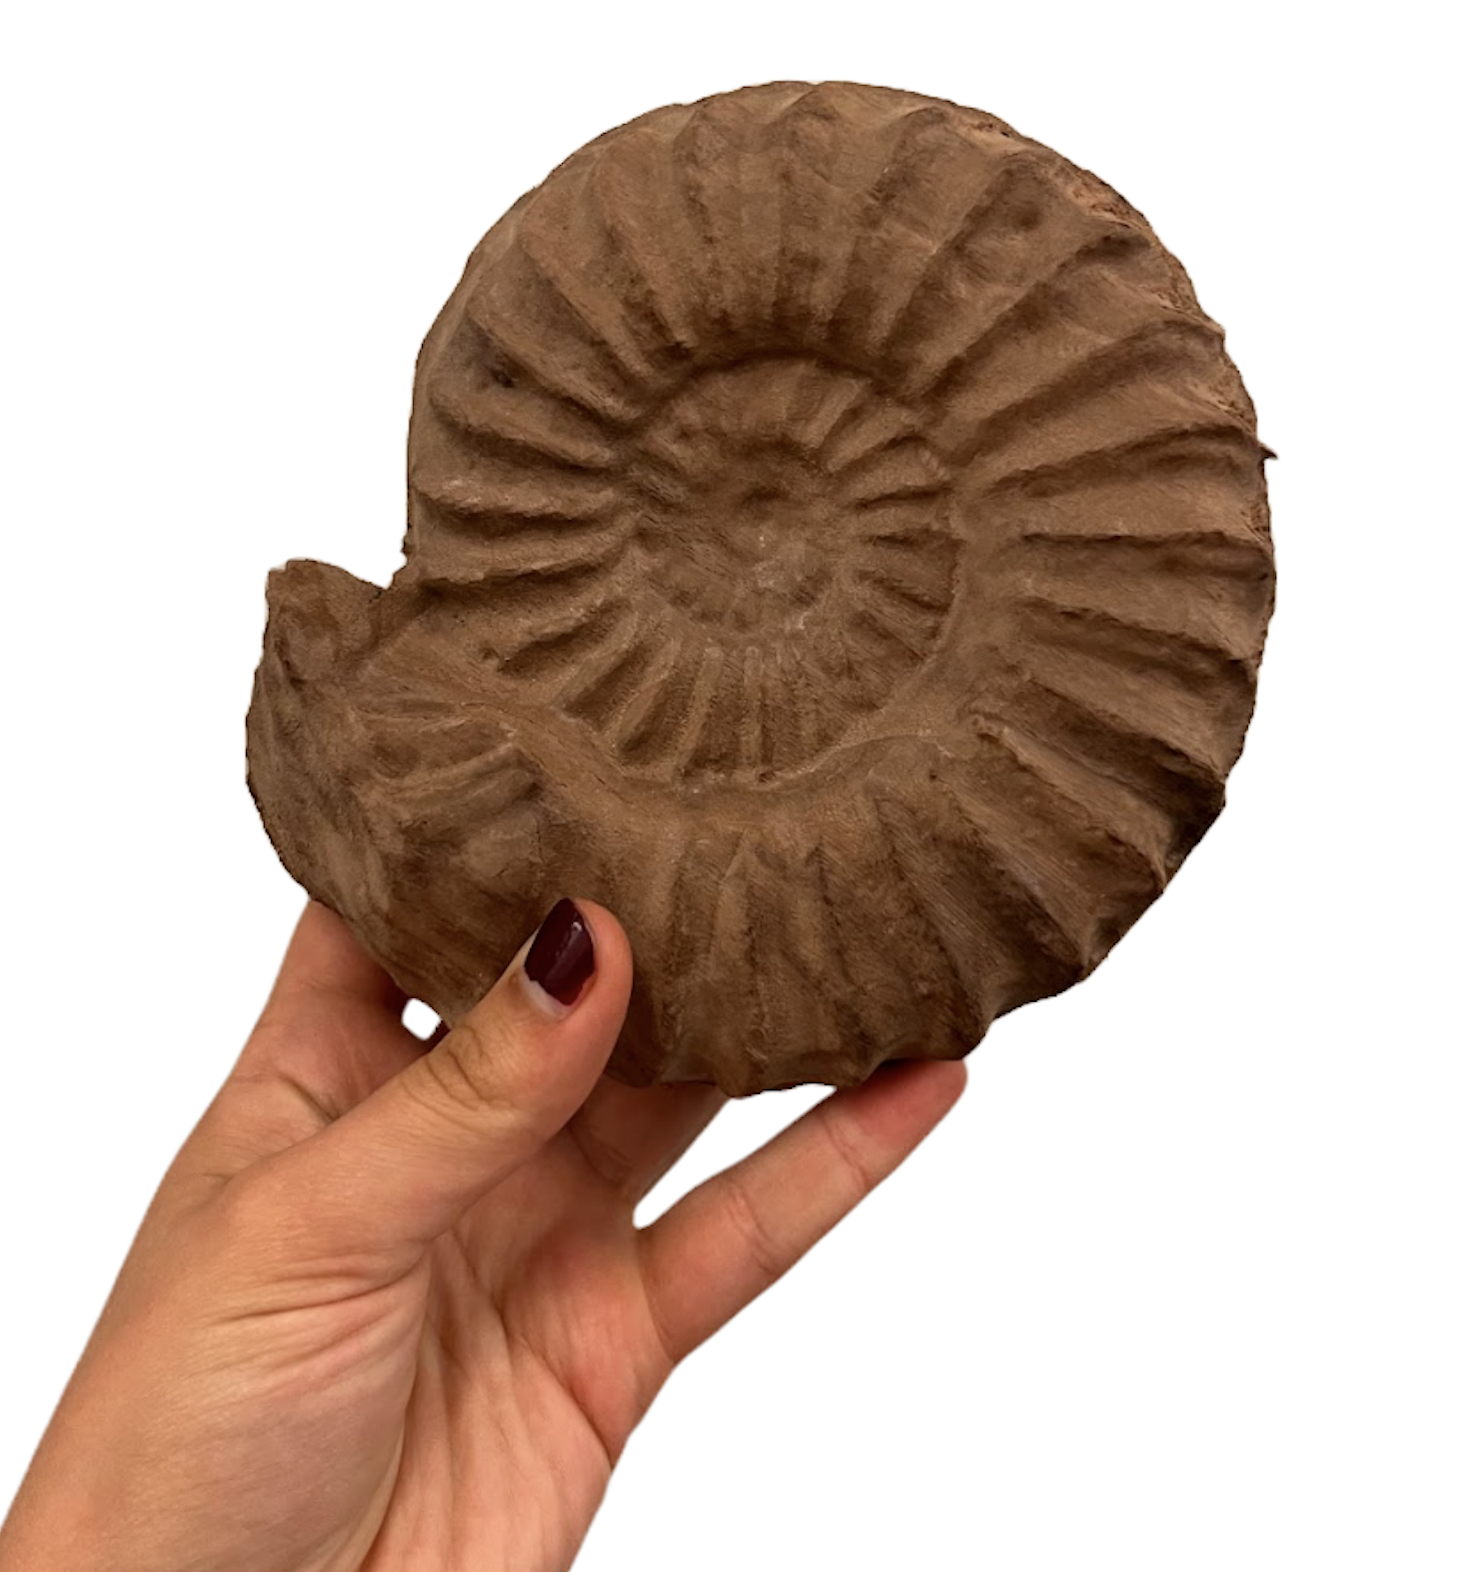


The Ammonite
My first double-sided CNC carving project. Because the version of Aspire available in my shop does not support true two-sided machining, I manually programmed all dowel locations, registration points, and cut alignments to ensure both halves of the model met cleanly. This required planning the flip sequence, creating my own alignment geometry, and double-checking offsets before running each pass.
I generated all toolpaths, selected tools based on chip load and surface finish requirements, and handled every tool change and zeroing step on the machine. The final piece was carved from a single block and flipped mid-process, producing a fully articulated, double-sided ammonite form.
The Process
First, I ran a test dowel cut with varying sizes to ensure that I knew the dimensions for a snug dowel fit.


Next, I fastened a piece of scrap plywood and took its height, width, and depth into aspire to fit my 3D model and generate my toolpaths.
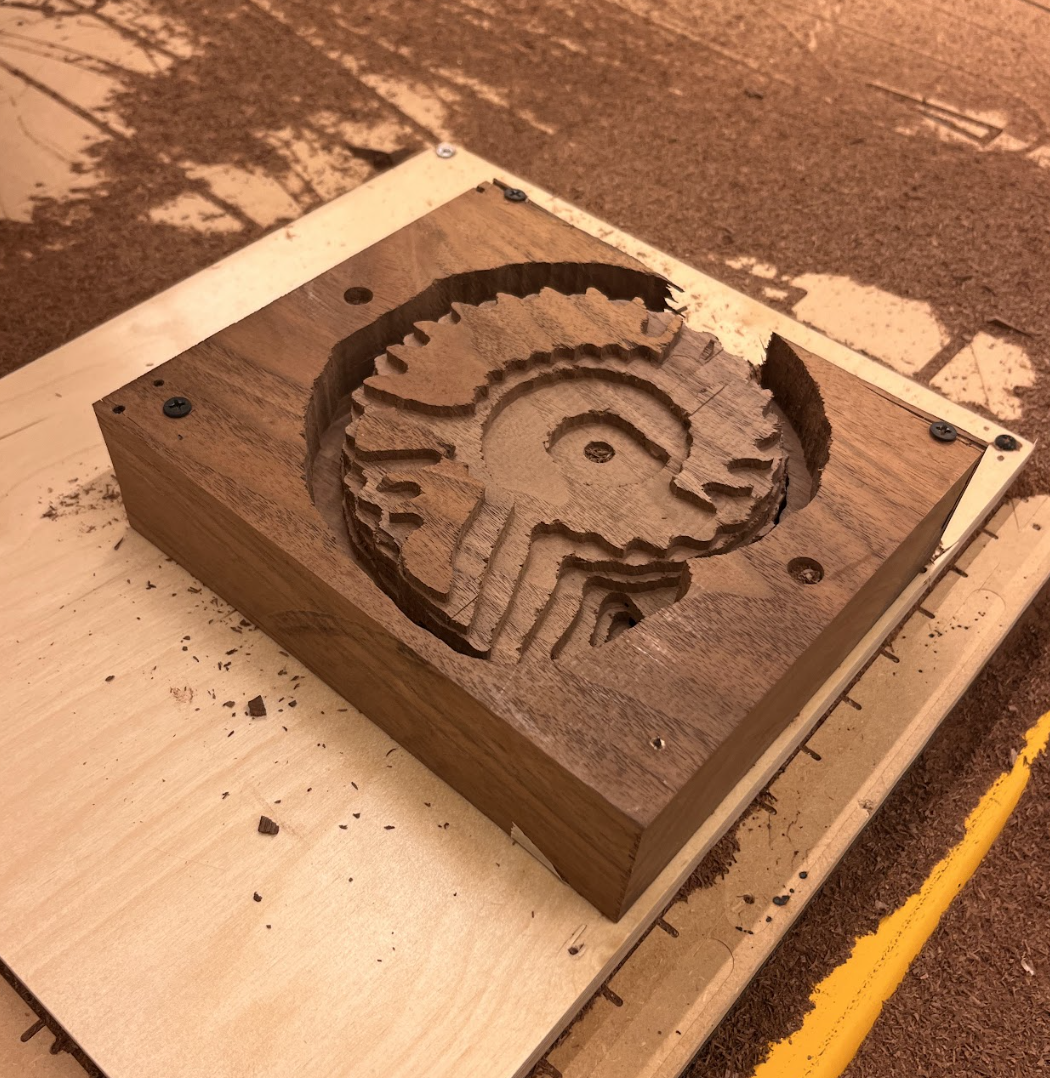
I began by running the first three operations: drilling the dowel holes, a roughing pass with a 0.25” square endmill, and a finishing pass with a 0.125” tapered ball endmill. Initially, I profiled the outer shape using tabs to keep the inner piece attached to the surrounding stock. After trying this approach, I realized that a cleaner and more reliable strategy was to use an onion skin instead—a thin remaining layer of material around the perimeter that holds the part in place without leaving tab marks. This adjustment gave me much more control over the final separation and resulted in a smoother edge during the last pass.
I flipped the piece over its horizontal axis, fit it snugly on the alignment dowels, and ran the next roughing and finishing passes.
After using a bandsaw to carefully extract the piece from its material, I was ready to move on to the final pass, using a hardwood base instead.
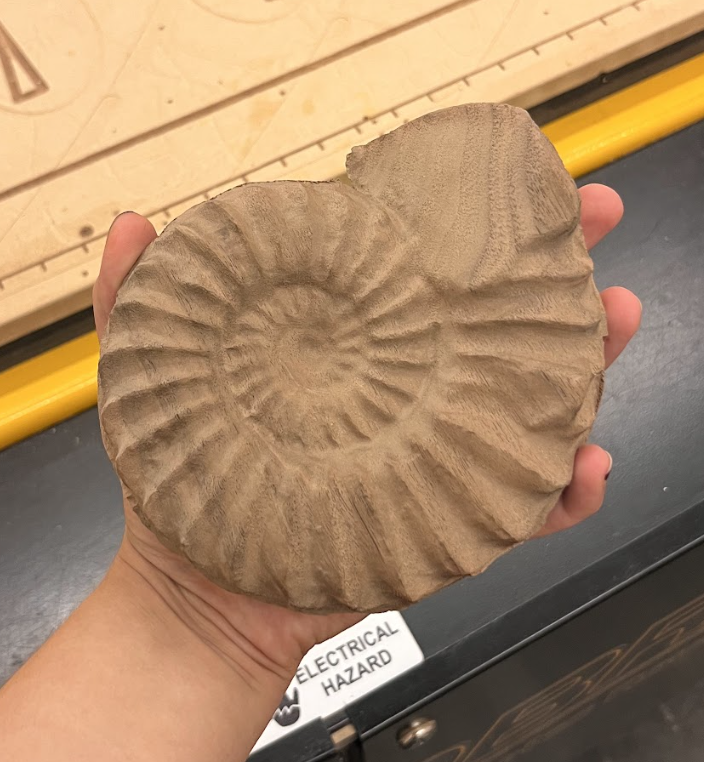
The Final Pass
After carefully running through the process on a test piece and learning what worked and what didn’t, I repeated the process on a piece of hardwood. First I set up my cut in the Aspire software, accounting for the altered size of the material and changing the feed rates to account for the harder wood. Then, I fixtured my piece to a spoilboard and then to the base of the CNC, zeroed out my axes, and ran my dowel cut and rough pass.


I switched out to a finishing bit, ran the fine pass, then flipped my piece over the horizontal axis (using the dowels for clean alignment), refixtured the wood, and repeated the process on the other side.

The onion skin between the top and bottom cuts ensured that my piece didn’t separate too early, allowing the cut to finish running smoothly
Finally, I used a band saw to extract the piece, and hand finished it with sandpaper to remove any rough edges and ensure a smooth, even surface finish.

Other Double-Sided Projects
Following this format — import 3D model, generate toolpaths, zero axes and moderate bit changes, and run cuts in order (dowels, rough, fine, flip, rough, fine), I undertook several other double-sided projects, accounting for their various materials and geometries as I produced their toolpaths and selected the appropriate bits.

I used PolyCam to create a detailed 3D scan of my mentor’s hand, then cleaned the scan up in Blender for a smoother CNC cut. This project is still in-progress, and needs to be sanded down to its final finish.

The Hand
Midas Cichlid
As part of an exploration into naturally “queer” species, I created a 3D model of a Midas cichlid, then followed the procedure I had established to realize it on the CNC.


Sockey Salmon
This piece was part of the same project as the cichlid. It was also the largest of my double-sided projects, at just under 20 inches long. In order to account for the greater length, I adjusted the 3D model in Aspire to reduce its thickness relative to its length. This preserved the form of the animal without surpassing the length of bit I had access to.